Boot XXDP from an emulated RL02
What you will have at the end
Section titled “What you will have at the end”DEC’s XXDP diagnostic monitor, booted by your machine’s own ROM, off an RL02 pack that is a file on the BeagleBone — and a prompt you can run the factory field diagnostics from.
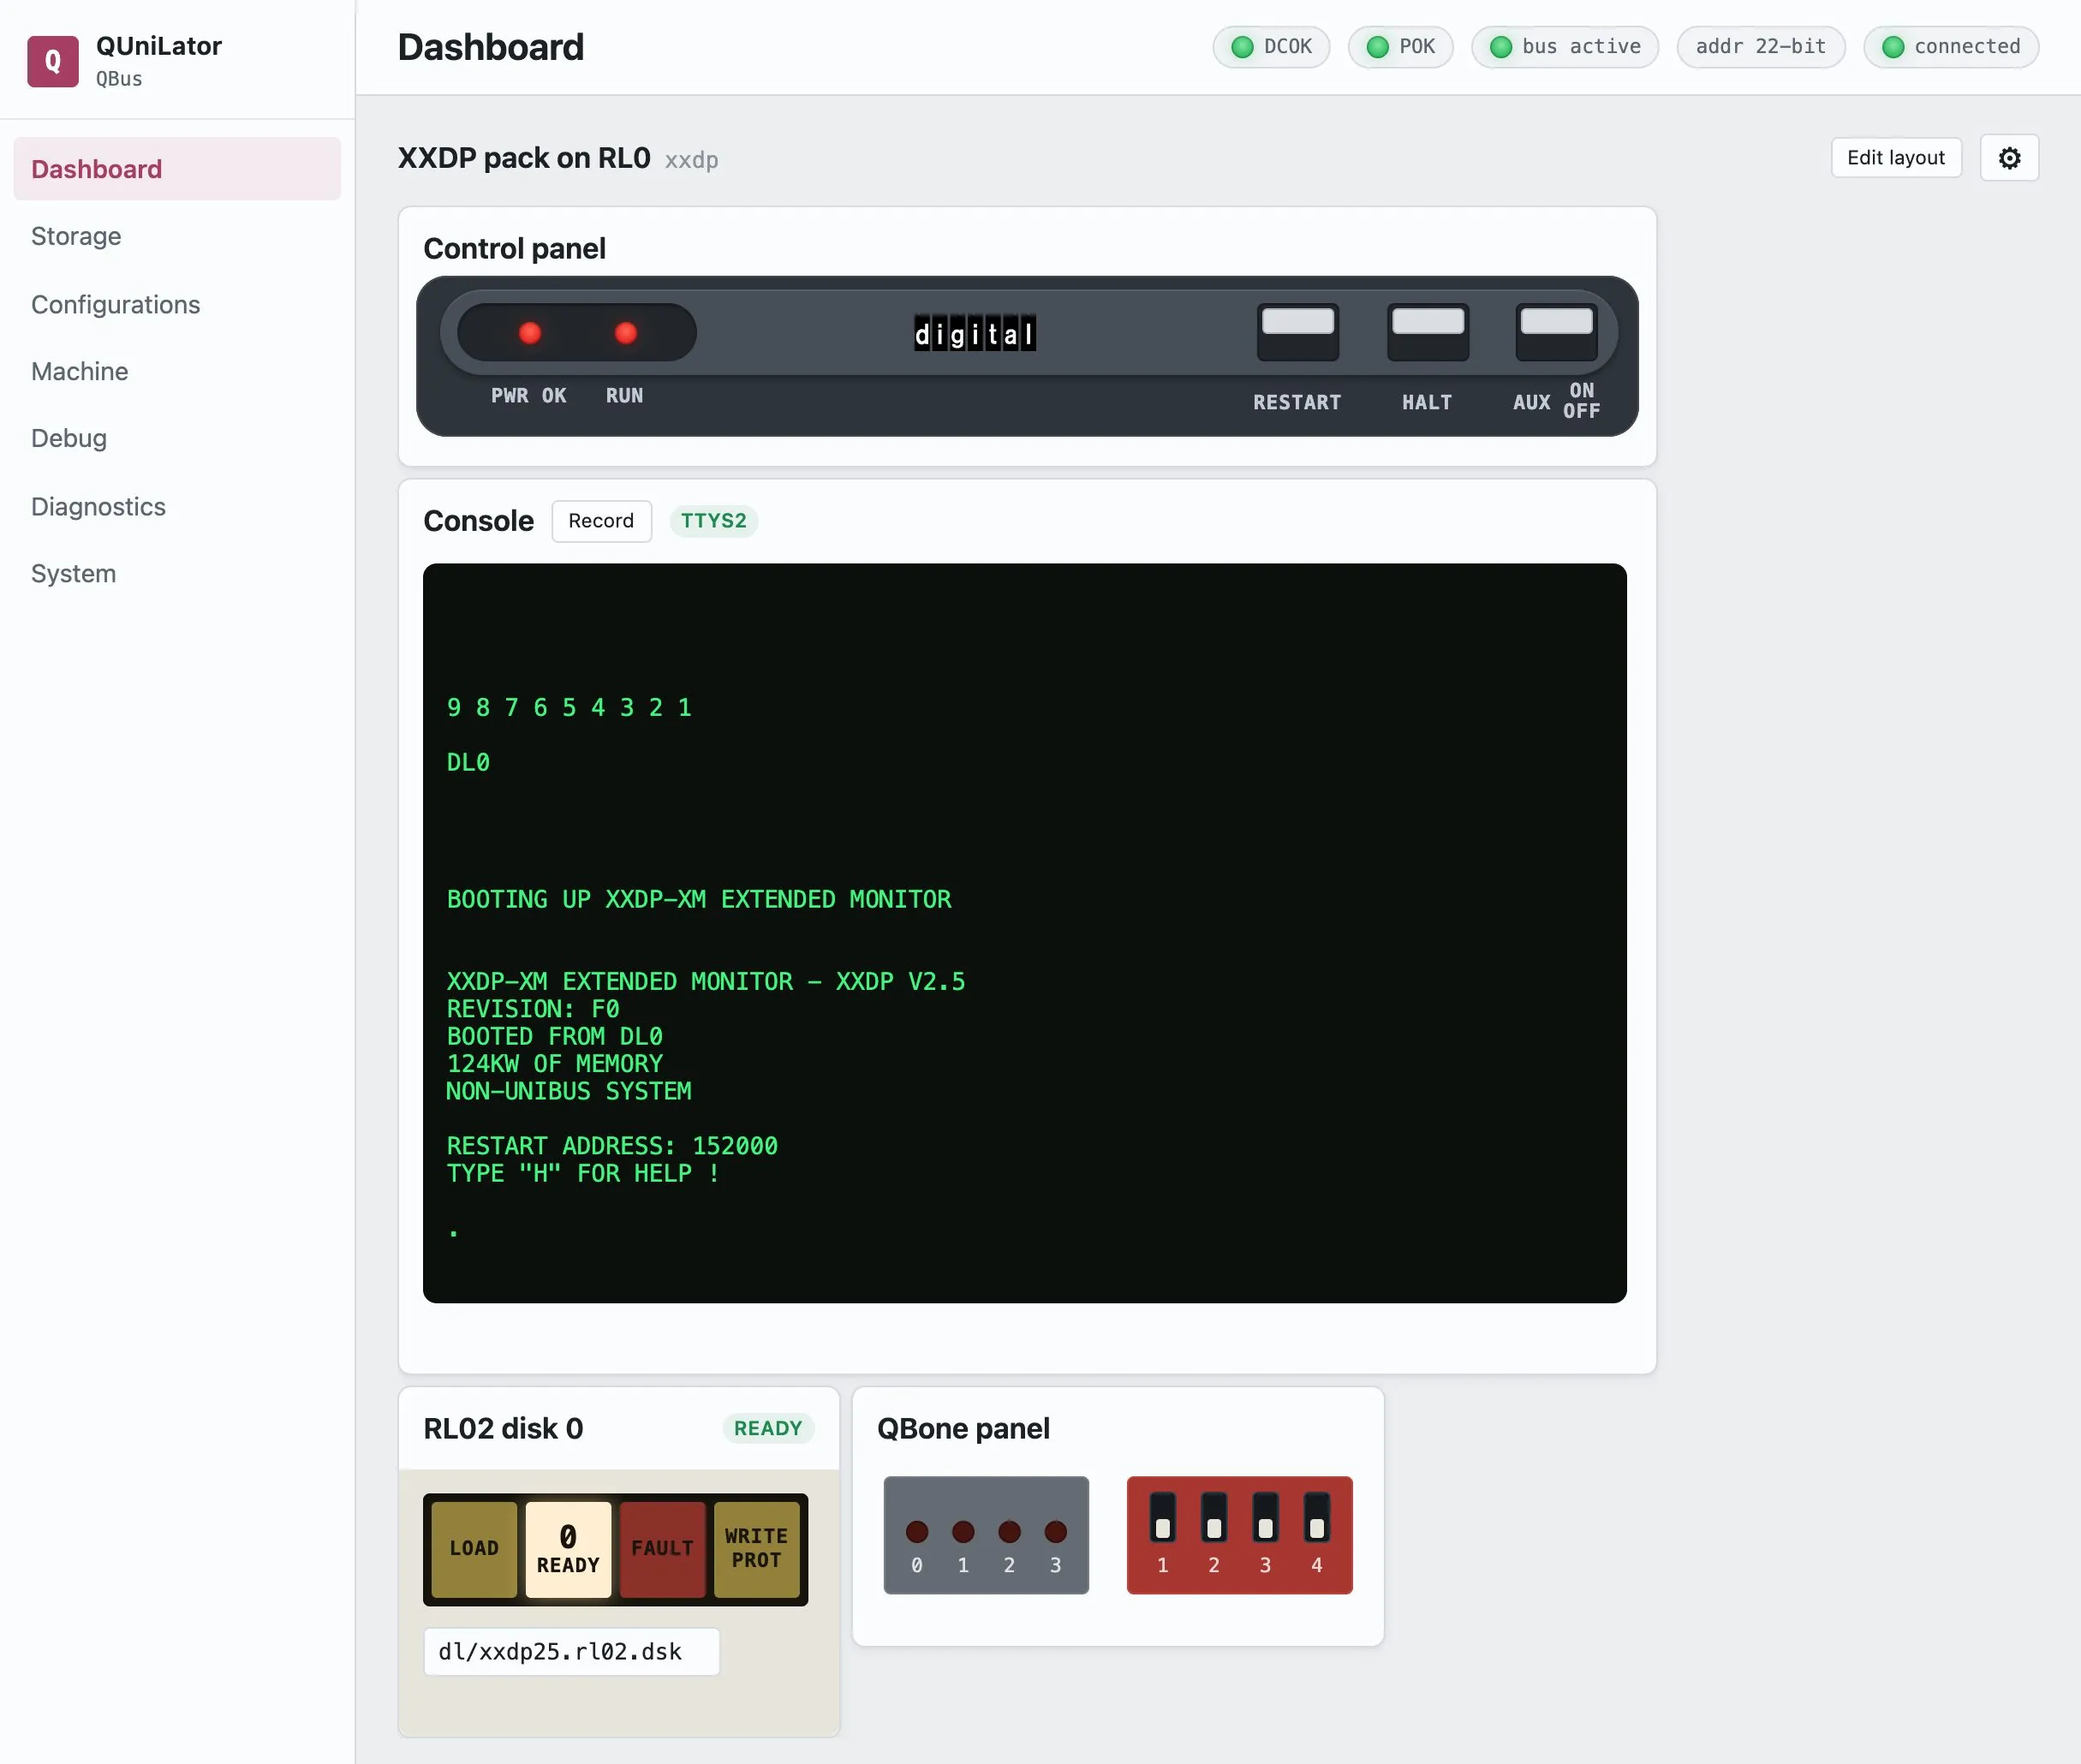
This is the shortest path from the card passes its acceptance test to my machine runs something, and it is worth doing before anything more ambitious: XXDP is small, it is the monitor DEC’s own diagnostics run under, and if it boots then the card, the bus and the processor are all talking to each other.
The machine
Section titled “The machine”| Processor | Real KDJ11-D (PDP-11/53), with its own memory, boot ROM and console line |
| Backplane | QBUS, with the QBone card in a quad slot |
| From QUniLator | The RL11 controller and the RL02 drive — nothing else |
The processor matters more than the model number. This one carries its own memory and its own boot ROM, so QUniLator supplies only the disk subsystem. A processor with neither — a bare KDJ11-A, for instance — needs QUniLator to supply memory and a bootstrap ROM as well, and the note at the end says what to add.
What you need
Section titled “What you need”- A QUniLator that passes the acceptance test, fitted to the machine.
- The XXDP 2.5 RL02 pack. It ships on the card image as
dl/xxdp25.rl02.dsk— check Storage before going looking for one. - Your machine’s console line cabled to the card, if the processor has a serial line of its own. On a KDJ11-D that is the console connector on the CPU board, running to the QBone’s UART2 with a null-modem cable.
1. Point the console at the right line
Section titled “1. Point the console at the right line”Open Machine. Under External console, set Source to BBB /dev/ttyS2
and Baud to whatever the processor’s own console line is jumpered for — 38400
on the machine here.
This is the step people lose time on, so it is worth a moment. If the processor has a console of its own, that line is the console and QUniLator only reads it. If the processor has none, set Source to Off and let QUniLator’s emulated DL11 be the console instead.
2. Build the machine
Section titled “2. Build the machine”Open Configurations and either pick the bundled XXDP pack on RL0 or make it yourself — it is two devices:
| Device | |
|---|---|
rl | the RLV12 controller, at its default 174400 |
rl0 | an RL02 drive holding dl/xxdp25.rl02.dsk, with power on and RUN/STOP pressed in |
The two drive switches are the ones on the front of a real RL02: power it up, then press RUN/STOP to spin it up. A drive left in LOAD never becomes ready and the ROM will not find it.
Leave DL11 disabled. The processor already has a console at 777560, and a
second one at the same address means two cards answering one address.
3. Switch the machine on
Section titled “3. Switch the machine on”On the Dashboard, press AUX ON/OFF.
The processor’s ROM runs its self-test, counts down, and boots the first device it finds:
9 8 7 6 5 4 3 2 1
DL0
BOOTING UP XXDP-XM EXTENDED MONITOR
XXDP-XM EXTENDED MONITOR - XXDP V2.5REVISION: F0BOOTED FROM DL0124KW OF MEMORYNON-UNIBUS SYSTEM
RESTART ADDRESS: 152000TYPE "H" FOR HELP !
.
BOOTED FROM DL0 is the emulated drive. NON-UNIBUS SYSTEM is XXDP telling you
it found a QBUS.
4. Run a diagnostic
Section titled “4. Run a diagnostic”At the . prompt, load the RL subsystem test:
.R ZRLGE0XXDP answers with the diagnostic’s banner and a DR> prompt. STA starts it,
and it asks what hardware it is testing:
DR>STA
CHANGE HW (L)  ? Y# UNITS (D)  ? 1
UNIT 0RL11=1, RLV11=2, RLV12=3 (O)  ? 3BUS ADDRESS (O)  174400 ?VECTOR (O)  160 ?DRIVE (O)  0 ?DRIVE TYPE = RL01 (L) Y ? NBR LEVEL (O)  5 ?
CHANGE SW (L)  ? N
Answer 3 for the RLV12 — that is the controller QUniLator emulates — and N to DRIVE TYPE = RL01, because the pack is an RL02. Everything else takes its default.
What can go wrong
Section titled “What can go wrong”| Nothing on the console | The line is not connected. Garbage means the baud is wrong; silence means the cable is. |
| The ROM does not offer DL0 | The drive is not ready. Check power and RUN/STOP on the drive widget — the dashboard shows READY when it is. |
? and an @ prompt | The processor is in micro-ODT, which means it halted rather than booted. RESTART on the control panel runs it again from the power-up vector. |
| The prompts loop forever | A DRS prompt marked (L) has no default, so an empty answer is not an answer. Type Y or N. |
If your processor has no memory or no ROM
Section titled “If your processor has no memory or no ROM”Some processors bring less to the party, and QUniLator makes up the difference. Ask the machine rather than guessing: Machine → memory probe sizes what is really out there.
| The processor lacks | Add |
|---|---|
| memory | the MEM device, sized to fill the space the probe found empty |
| a bootstrap ROM | MRV11-D on QBUS, M9312 on UNIBUS |
| a console line | DL11, with External console set to Off so it can have the port |
Save what you built — Save As… on the Configurations screen — and bind it to a Power-on DIP setting so the machine comes back by itself. Then take on a real operating system: 2.11BSD on an MSCP disk.